How to get your app featured on the App Store

Get featured on the App Store
Photo by Medhat Dawoud on Unsplash

I’m a Swift developer and indie maker. I have made several apps, and they’ve got featured on the App Store every time. Threader, a Twitter client that curates good threads and displays them on a single page, even became featured as App of the Day.

Here is some advice from my experience that might help Apple consider your app for promotion as well.

Note: Although this advice applies to all app categories, the game category is a bit more specific. I won’t cover the game app category in particular in this post.


How to get featured in the “New Apps We Love” section

Threader featured in New App We Love on the iOS App Sore
Threader featured in “New Apps We Love”

A clean app

Of course, the first thing to consider is how to make a bug free app with a clean design. Think design, UX, and wording among other things. Don’t forget to test it (different devices, different OS, different people…).

Make things homogenous: use the same set of fonts and colors everywhere. Avoid text when you can. Don’t reinvent the wheel, especially if you’re not a designer. Use the standard iOS items: buttons, navigation bar, and so on.

It’s not always possible, but it can be useful to see people use your app. If you see that they’re not using it as expected or don’t manage to perform certain actions, then you might need to review your UX.

Use Apple’s APIs

Apple promotes their own products. They’ll be more inclined to feature an app that uses the latest Swift version and uses their own APIs. In 2017 they released ARKit and made a special category on the App Store to promote the apps using it.

Extensions

Although I don’t have solid proof of this, Apple likes when you take advantage of all their platforms. Think of iMessage, share & action extensions, and so on.

For example, Threader has an action extension. It allows you to open a thread directly from Twitter and read it on a single page, just like on the app. It’s an extension of the main app. It’s useful and allows certain actions outside of it, without opening it.

Using Threader's iOS extension on Twitter
Threader’s action extension to read a thread directly from Twitter

Great visuals

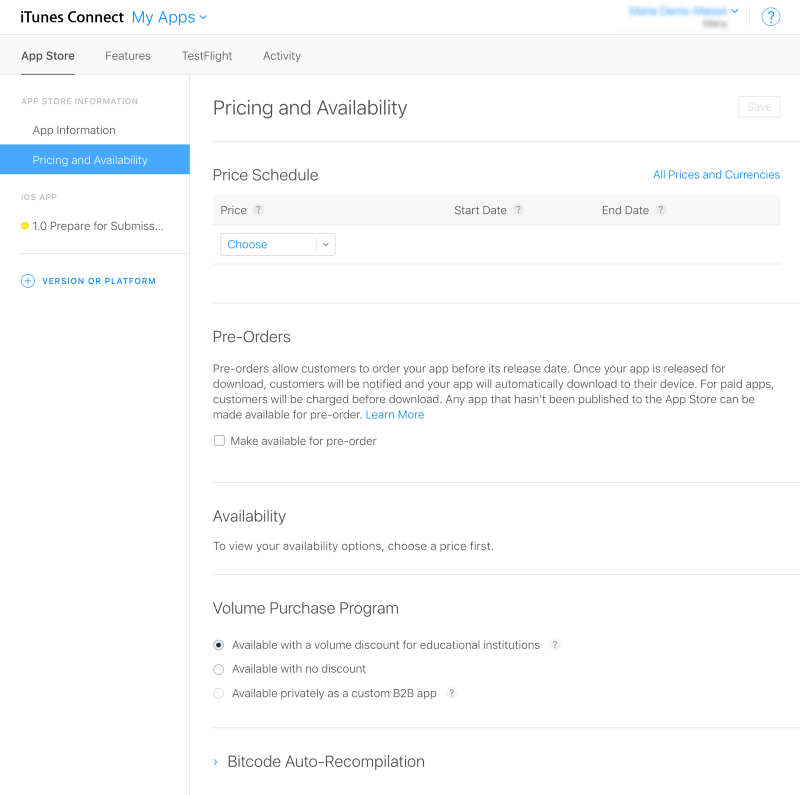
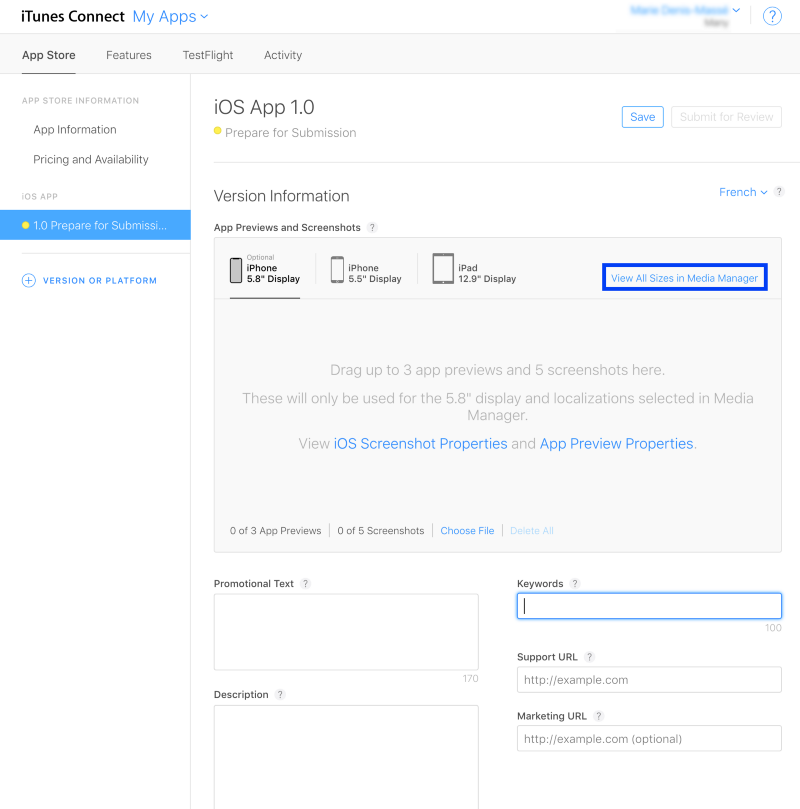
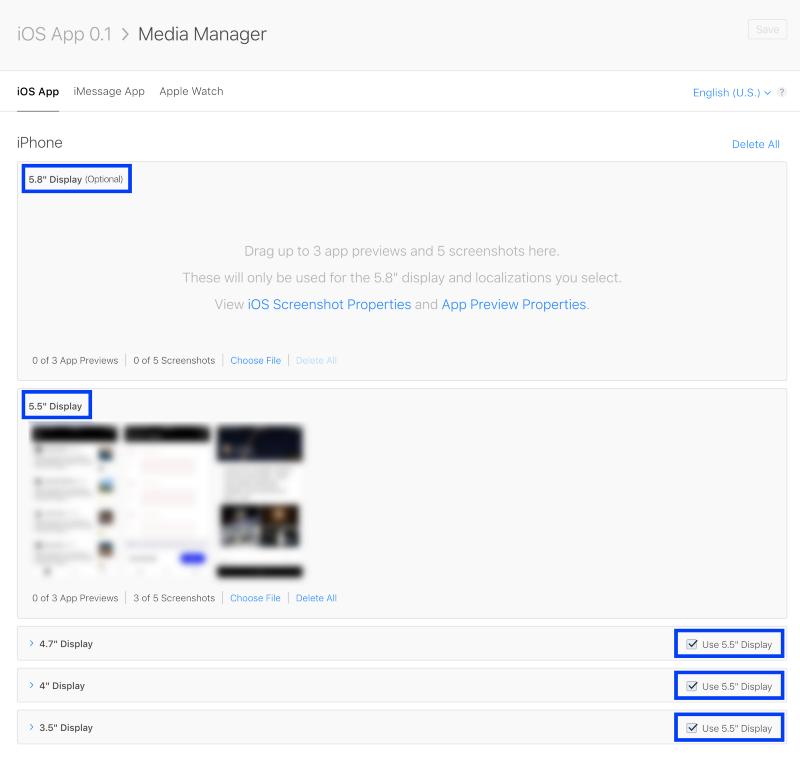
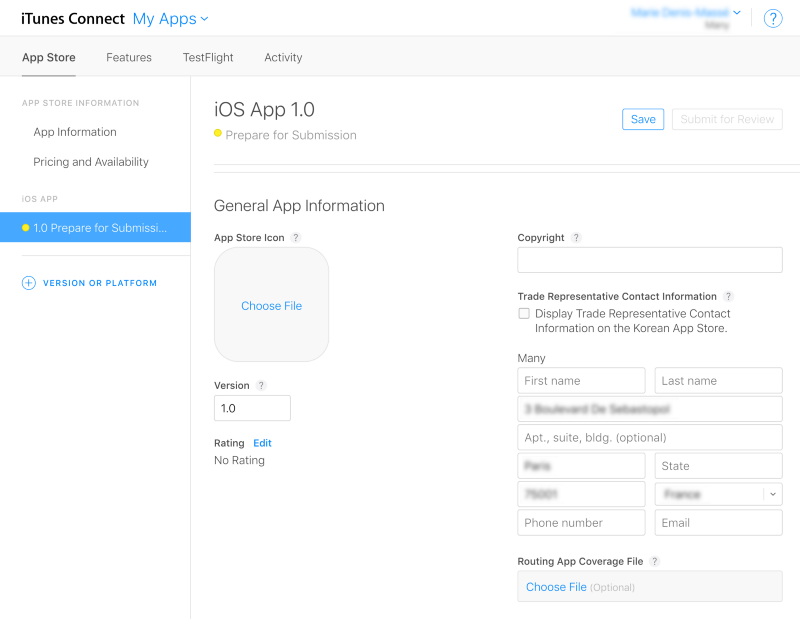
All the information about your app is important and plays a role in getting featured. You can (re)read my previous article explaining how to submit an app. There’s some useful info in there (like the “Prepare for submission” and “App previews & screenshots” sections). The most important thing is your visuals. Make something clean, simple to understand, and with fewer words…

Threader's visuals on the iOS App Store
Threader’s screenshots on the App Store

Frequent updates

Apple likes frequent updates. Users like frequent updates. This doesn’t mean you need to create a new feature every day. But fix bugs, get feedback from your users, and push updates regularly.

Frequent updates are also recommended if you want to stay featured longer and stay on the top of the App Store. I push an update every two days or so when I’m featured. About once a week when I’m not.

iOS only

If your app is only available on iOS (meaning no Android version), I recommend you mention it. I suspect Apple likes exclusivity.

Ratings

Apple introduced a way to reply to users’ reviews on iTunes Connect. It’s useful to thank the good ones, but also to understand what went wrong for the bad ones and reply to those as well.

Threader iOS App Ratings and Reviews
Reply to users’ reviews

Localizations

Translate your app into different languages. Especially if your app is available in several countries. Apple will appreciate that you took the time to do it.

It’s an annoying task, and localization is pretty hard to update. That’s why you should do it in the latest possible phase of your app development. I hope Apple will improve this one day, since it’s really painful.

Keywords & search results

ASO (App Store Optimization) is the process of improving the visibility of a mobile app […] in an app store. — Wikipedia

That’s why you need to choose your keywords carefully. I use App Annie sometimes to check the quality of my app’s keywords.

Finally, the most important step: Fill out the form

There’s actually a form to fill out to contact the App Store Editorial Team to get promoted.

Important to note: “please let us know 6–8 weeks in advance”. So think about it way before you submit your app. Especially for iOS where the market is way more crowded than the macOS market, for example.

App Store form to fill to be considered for promotion
Contact form to fill out in advance

For me, the two most important fields in the form are:

  • The “App Details / Describe your app” section
  • Your Story

Globally, this is like sending your resume to Apple for an application. Sell your app and yourself (or your dev team).


The Holy Grail: How to be App of the Day

Threader featured App of the Day on the App Store
Threader featured as App of the Day

If you get featured, then Apple might consider making your app the App of the Day or featuring it in the App/Game tab. If that’s the case, you’ll receive an email. You’ll have to produce several pieces of artwork/visuals and submit them via iTunes Connect.

A few pieces of advice from my one-time-being-App-of-the-Day experience:

  • Be creative and look at the other Apps of the Day to give you an idea of what they look like.
  • Carefully follow their guidelines for the artwork
  • Respect the deadlines
  • Consider releasing your app worldwide if that’s not already your plan. If you’re featured as App of the Day, you will get featured in all the countries where your app is available.
Promotional Artwork section on iTunes Connect
Promotional Artwork section on iTunes Connect

Just so you know, even if you submit your artwork, it doesn’t mean Apple is going to feature you. I know. You worked hard on this. And it might lead to nothing.

Also, after you’ve submitted your artwork, you probably won’t get any news from Apple about the status of your app. You just wait. And that’s it.

Let’s take my example: our apps have been considered two times for promotion. Both times we provided the artwork and waited for weeks. Both times we didn’t get any news. We didn’t get any replies to our emails. One app did not get featured. The other has been App of the Day. Without notice.

Additional general advice

Additional advice to get featured on the App Store
Photo by G. Crescoli on Unsplash

The competition

Remember that the iOS App Store is very crowded. A lot of apps go out every single day. For example, I published IP Man (a Mac menu bar app to easily copy/paste your IP) to the Mac App Store. Even though I didn’t respect the deadline of ‘6–8 in advance’ (I know I didn’t respect my own guidelines), they featured it. And I can tell you it helps a lot with sales.

The Mac App Store is a good place to sell apps. There are way fewer apps available, so there is less competition. That’s likely why IP Man got featured.

IP Man featured in New Apps We Love on the Mac App Store
IP Man featured in “New Apps We Love” on the Mac App Store

Who are your competitors

Another piece of advice I can give you is to look at your competitors who got featured, and other featured apps in general. I’m not saying all apps look the same, but there is definitely a pattern. Sell your app the Apple way. Use their vocabulary and their design style.

Note, though: You don’t have to say everywhere that your app is “insanely great”.

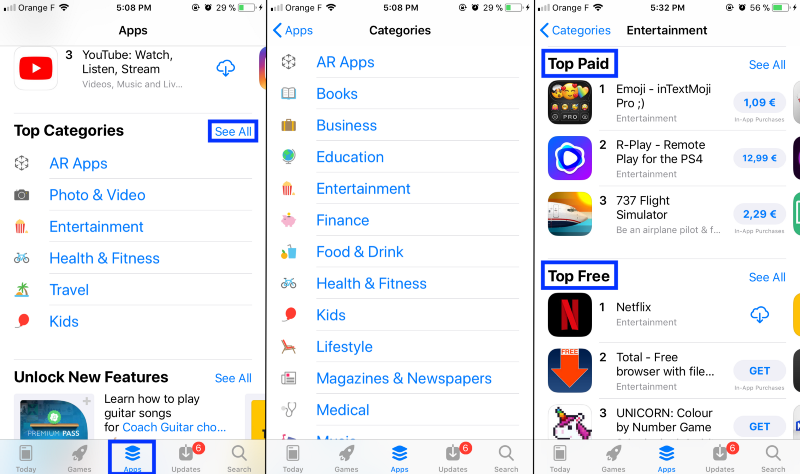
What you can do: on the App Store, go on the central bottom ‘Apps’ tab. Scroll until you find ‘Top Categories’ and click on ‘See All’. Now you see all the categories. Select the ones your app is in and navigate through the top apps: these are you competitors.

Check your competitors on the App Store
Check your competitors on the App Store

You can also check the Today tab and see the last week’s Apps of the Day. This gives you at least 6 examples.

Check the Today tab on the App Store
The Today tab on the App Store

You don’t actually know if/when you’ll get featured

Apple doesn’t notify you. So like us, you’ll just notice a pick up of new users. You’ll check where they came from, not understanding what is happening. Then check the App Store to see if you are featured. And celebrate.

Useful links to become an App-Store-Feature Master

Useful links to become an App-Store-Feature Master
Photo by Alfons Morales on Unsplash

In general, follow Apple’s guidelines. I think it’s the most important.

I’m on Twitter if you want to see if my next apps will be featured or not 🍏📱 You can also subscribe to our newsletter and get notified the next time we publish an article here.

This post is also available on AppStoreMakers.com.

The beginning of Women Make

I am excited and scared, this is my first ever blog post. But I am happy to be sharing what I’m working on and writing about something I truly care about: the beginning of Women Make and what let me to create this community.

Women Make womenmake.com

Who am I?

I am a French indie developer and maker who has worked in the tech industry for a few years now. This field can be tough when you are a woman but I never felt like it was my place to do something about it. I admired those who are involved in making a change, there is so much work to do. That’s why I often feel overwhelmed, because it requires significant effort to make very little impact. I never participated in these debates in the past, except over conversations with friends at diners.

Me, Marie Denis, and my god, Flip
This is me with Flip ️💕

Although there are existing communities, I never felt that I could identify with them as most of them appeared to be a group of working girls talking politics and making appearances at fancy events — which I do believe they should be doing, I just couldn’t identify myself with these groups.

Over the last few years, I have spent most of my time coding and recently (last few weeks) have started to talk with more people (mostly online). I used to live in Paris, however, after I discovered Pieter Levels a few months ago he made me understand that I didn’t have to feel guilty about not wanting to connect with the toxic Parisian startup ecosystem. I left my apartment and became a digital nomad. Now I build my products in public and have since met a community of makers through Twitter and wip.chat. I now feel less alone and more confident in the what I am doing. All these changes have seemed for the best and have made me feel better. I am still anxious but that’s probably part of the job — but I am feeling more aligned with myself than before.

Why Women Make?

Since I’ve been connecting with other indie makers like me, I soon realized that I was only talking with men — which I’m kinda used to as I went to an engineering school and although they had a pretty decent quota of women, I still mainly talked with men.

I came to the realization: “That’s my fault. I don’t talk to women because I don’t reach out to them.” When I started to look for them it was actually a real struggle. Where the women makers at? It’s already difficult to find interesting/relevant people to follow on Twitter, but now I was trying to limit my search to women which made it even more difficult.

Women Make on Telegram
The group on Telegram

That’s when the idea of creating a group on Telegram came to me. I searched for women who had an account on wip.chat and contacted them directly. I also tweeted the link and made it public to keep it open to everyone. It was exciting to see people coming up on the group — even when it was just curiosity. We do have a certain % of men in the group. They are active and supporting the growing women maker community by inviting their female friends! I was happy because I managed to do what was important to me: gather some women makers so that we could feel less alone, chat together and support each other.

After I made the group, I quickly realized that there was so much more that could be done with this community. Pretty quickly I wanted to create a website that listed the members. Any new person coming to the site would know there are plenty of other women makers across the world she can talk to and get support from if necessary.

So, what’s next?

I see there being 3 main challenges on this project:

  • Attracting more women makers (and other underrepresented demographics in general) on the group.
  • Make this future website a useful platform for us.
  • Keep a good ratio of men to women as this group is open for everyone to join.

I’m really excited to work on this and make something useful that could be helpful for people. I’m really glad that I’ve met all these awesome people building amazing things. Our small community has already helped me a lot on this project (thanks Jess, Una, Toni, Manasvini, Abhinaya, Katelyn, Aleksandra and all the others 💖).

Women Make website womenmake.com
womenmake.com

It was hard to write this 1st article. But I did it and I hope to start writing more and keep you updated along the way.


You can subscribe here if you want to get notified when the website is out.
You can join us and spread the word to your women friends. You can contact me on Twitter if you have suggestions about this article or the project, or just want to talk to me 🙂

❤️ Lastly, I’d also like to thank Vincent who’s helping me on this project, as well as Jess and Tigran for the re-reading.


If you want to help me to develop this community, you can support me via my Patreon.

Women Make Patreon

Get notified the next time we publish an article here by subscribing to our newsletter.

Submit & publish your app on the App Store

I wrote this article because when I started to develop on iOS this tutorial would have been a great help. The process to publish an app to the App Store can be confusing at first. But like everything else, once you know how it works it’s much clearer and you don’t spend time on it anymore.


I assume you already have a developer account and an app to submit. This article is written for iOS apps, working on Xcode 9.

NB: This article was originally posted on AppStoreMakers.com.


They are 2 main steps for an App Store submission:

  • You need to create your app on iTunes Connect where you’ll need to enter some information (displayed on the App Store or needed for the review team).
  • Upload the actual file, using Xcode in our case.

It’s not that complicated but it can feel a bit messy the first time. Here’s a guide to help you through the procedure.


1) Create your app on iTunes Connect

Go to iTunes Connect and login with your developer account. Select « My Apps » then click on the « + » sign on the upper left and choose « New app ».

Login on iTunes Connect
Select “My Apps”
Click on “+” then “New App”

A. General information

You need to enter some information about your app.

Information of your new app
  • Platform: simply the platform of your app.
  • Name: simply the name of your app. It might be already taken. In this case, you can add a short sentence to make it different. Ex: If ‘Many’ is already taken, try ‘Many — Share videos with your friends’ instead.
  • Primary language: that’s the main language of your app. If you translated it into several languages, you’ll be able to add these later don’t worry.
  • Bundle ID: you can find it in Xcode in your target general info
  • SKU: a unique ID. It won’t be public so it’s up to you to choose it. Personally, I often put my bundle ID.
Your app’s bundle ID

B. Choose your categories

Now that you are on the ‘App Information’ tab of your app, you’ll find the information you just entered and some new ones you need to fill. One important thing is the ‘Category’ field.

The category field

In my opinion, you need to choose it according to these 2 factors:

  • Obviously the category of your app.
  • The competition. If you app could fill in 3 categories, you may choose the 2 where there is less competition.

💡 Tip: On the App Store, go on the central bottom ‘Apps’ tab. Scroll until ‘Top Categories’ and click on ‘See All’. Now you see all the categories. Select each category you’re interested in and navigate through the top apps: these are you competitors.

Check your competitors

💡 Tip: Actually, choosing a second category is optional but one more category is potentially one more chance to be featured.

Don’t forget to regularly click ‘Save’ on the upper right corner.

C. Pricing and Availability

On the left, click on the ‘Pricing and Availability’ tab. Here you can enter the price of your app (free or paid). There is nothing much to say.

Pricing and Availability of your app

D. Prepare for submission

On the left, click on ‘Prepare for submission’. This is the biggest part actually.

  • App previews & screenshots

As you can see, there are a lot of sizes but you don’t have to give them all. Click on ‘View All Sizes in Media Manager’. As you can see, 5.8” is optional, 4.7”, 4” and 3.5” can use 5.5” Display. Drag and drop 1242 x 2208 px screenshots (or 2208 x 1242 px in landscape) in the 5.5” Display section. You can upload up to 5 screenshots.

App Previews and Screenshots
Media manager

💡 Tip: Do upload 5 screenshots. This is important. It is your window display on the App Store and a communication support. The first one is the most important because when scrolling on the App Store, users can see your app title, subtitle, logo and first screenshot, so do it well.

What you put on it is up to you but I’d recommend clear images and little text. It needs to be easy to read and simply understandable. If it’s too complicated people will give up. Give them a reason to see more and download your app.

You can also add up to 3 previews, which are short videos (15 to 30 seconds). Use them to present your app. Don’t try to show how everything works, just the main functionalities. Just like before, the aim is to give the users a reason to download your app.

Like the screenshots, the required resolution is for the 5,5″ Display, others are optional. Your file can’t exceed 500MB. See all the specifications here.

  • Promotional Text and Description

This is what users will see on the App Store. The promotional text will appear above the description. Unlike other fields, the promotional text can be modified without submitting an update.

  • Keywords

Keywords are very important. They are linked to the search results in the App Store so you need to choose them carefully so people can find you (or you competitors apps). We’ll make a separate article on the App Store Optimization.

💡 Tip: To maximize the number of keywords, separate them with coma but without spaces (ex: social network,video,messaging,messenger).

  • Support url

Don’t forget to fill an url where users can get information and contact you (this could be the contact section of your website for example).

  • General App Information

Scroll down to the ‘General App Information’ section.

General App Information section
  • You need an app icon with 1024 x 1024 px dimensions. You don’t need to upload it if you use Xcode 9 or later since it’s done automatically when you upload a build.
  • Enter the same version as your Xcode project.
  • Click on ‘Edit’ next to ‘Rating’ and enter the appropriate categories then click ‘Done’.
  • Fill the copyright (ex: Copyright © Company-name Release-year)
  • Enter your company information (name, address, phone, mail, etc).
  • App Review Information

Scroll down to the ‘App Review Information’ section. This is meant for the review team who approves your app (or not).

App Review Information

If we need to signup to use your application, you need to provide some credentials for the reviewer (so he doesn’t have to create an account). Fill the contact information with the information of the person in charge. This is the person the reviewer will reach if needed. Don’t hesitate to write some notes or add an attachment if you think it’s necessary.

  • Version release

Scroll down to the ‘Version release’ section. Select the way you want to release your app once it is validated. You can publish it as soon as possible by selecting ‘Automatically release this version’. You might want to select ‘Manually release this version’ if you need to do something before the release (like making an announcement, publish an article or something else). If you are very well organized, that you have a specific release date and plenty of time before then, select the 3rd option and enter your date.

Version Release section

💡 Tip: Keep in mind that the submission process usually takes a few days (sometimes less, sometimes more). Also, you won’t necessary be validated; unfortunately you can also be rejected. Then you’ll need to submit a new build. You can’t be sure you’ll be able to release your app in 3 days for example. You need to take it into account in your planning, and so in the ‘Version release’ mode you select.

Don’t forget to click ‘Save’ on the upper right corner.

Verify that there is no issue highlighted in red (a screenshot missing or an empty field for example).


2) Submit a build with Xcode

The last step to submit an app is to actually upload the app.

A. Create the archive

Go to Xcode and select the General Info panel of your target. Enter the version and the build of your app.

Version and build of your app

Run your app on a real device (not on a simulator). Once it’s done, go to the ‘Product’ menu then click on ‘Archive’. This can take a few minutes (you can see the progression bar in Xcode, just like when you build an app).

Archive your app

B. Upload the file

To access the archive, go to the ‘Window’ menu then click on ‘Organizer’. When the operation is done, you’ll see the archive in the window appear here. Select it then click on ‘Validate…’. Select your team then click ‘Choose’ then ‘Validate’.

Open the Organizer
Validate your app

If some errors are displayed, you need to resolve them before going further. Then repeat the previous step. If everything goes well, select your app archive again and this time click on ‘Upload to the App Store…’. Just like before, choose your team then click ‘Upload’. You might need to resolve some errors again. If everything goes well, your archive has been uploaded.

Upload to App Store

💡 Tip: The upload can be pretty long. And sometimes it’s not working. When Xcode displays an error, the problem can come from you but it can also come from Apple servers… In this case you can’t do anything but repeat the upload until it works. A good internet connection is a plus 😉

Now you need to wait. This can take some time before your build is actually visible on iTunes Connect.

C. Submit the build

Once it is, go back to iTunes Connect in the ‘Prepare for Submission’ menu. Scroll to the ‘Build’ section. Click on ‘Select a build’ and now you should see the one you just uploaded. Select it and click ‘Done’.

Build section
Select the build to submit

Click ‘Save’ on the upper right corner. Then click on ‘Submit for Review’. You’ll be asked a few questions. Click ‘Submit’.

💡 Tip: As said before, it might take some time before Apple has actually complete the processing of your build. So if you don’t see your build available on iTunesConnect, don’t worry and wait for a bit. You should receive an email to notify you when you the build is ready to submit.

D. Waiting For Review

You are FINALLY done. Your app is now in the ‘Waiting For Review’ stage. You will receive 2 emails:

  • one when the team will start to review it, then your app will switch to the the ‘In Review’ state
  • one when they are done, then your app will switch to the ‘Approved’ state

If your app is validated you have nothing to do except release your app if you selected the manual mode. You’ll switch to the ‘Processing for App Store’ state and then the ‘Ready for Sale’ state.

If you are rejected, you’ll receive a message in the Resolution Center (you’ll have a notification you can click on in iTunes Connect). In most cases, you’ll have to make some corrections on your app and submit a new build. Sometimes you just need to give more information and answer to an Apple employee so they can continue the submission process. Sometimes it’s more complicated… If you get rejected for a strange reason, don’t hesitate to tell us so we can share it with everyone. This can be useful to other people.

💡 Tip: When your app is released, it might take a few minutes before it’s actually visible on the App Store. And if you list your app link (on your website for example), don’t forget to update it.


Anyway, good luck with your app submission!

If you have any questions, send me a message on Twitter. Get notified when we post a new article here by subscribing to our newsletter.


Next step is to get featured on the App Store. And it’s actually not that complicated! I wrote another post to help you with that.